Over a year ago we started looking at vCloud Director as it was slated to replace Lab Manager. The beauty of Lab Manager for us was we could clone the same VM’s thousands of times and have them “fenced” from each other for software development, training, automated testing, and supporting clients. We could do this very rapidly and save a lot of disk usage costs with Linked-Clones as well.
We ran into an issue with some of our software packages that didn’t like the IP address or hostname changing during the guest customization process though. Another issue was the confusion created by the VM using IP’s from the Physical Network pool and and the virtual routers using the same pool for NAT’d access to the VM’s. We worked around all of this by using Network Templates for the VM’s and connecting those to the Physical Networks upon deployment. This way the VM’s have the same IP (192.168.x.x) and MAC address and they are still “fenced” from others VM’s on the external network (10.x.x.x).
It took awhile to figure this out in vCloud Director when we were first testing it. After a couple days of reading posts and numerous tests I figured out how to mimic this setup. I thought I’d share as I’ve answered this question numerous times on the communities pages.
Whether modifying a current vApp or manually creating a new one you’ll select “Add Network” to create a new network for this vApp.
You can use the default 192.168.2.0/24 network if you wish and just add DNS information or you can change the settings to your liking.

Name the new network and finish it’s settings.

The network setup will now look like this. You have the option to automatically use IP’s from the pool you created, manually assign and IP from the subnet, or use DHCP from the vShield system. Click Next when done as we still need to connect this internal network to an Organization Network.
![]()
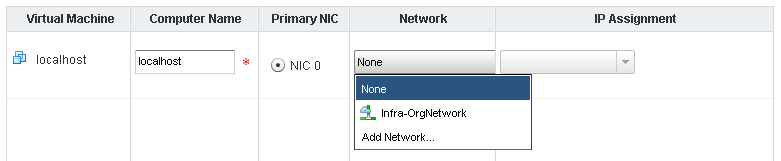
Click “None” in the connection column and select the proper Organization Network. Decide if you want to use NAT only or add firewall settings as well. You can also have this vApp keep the same IP it gets from the Organization Network if you’d like. We don’t do this so IP’s are not reserved when not in use.
![]()
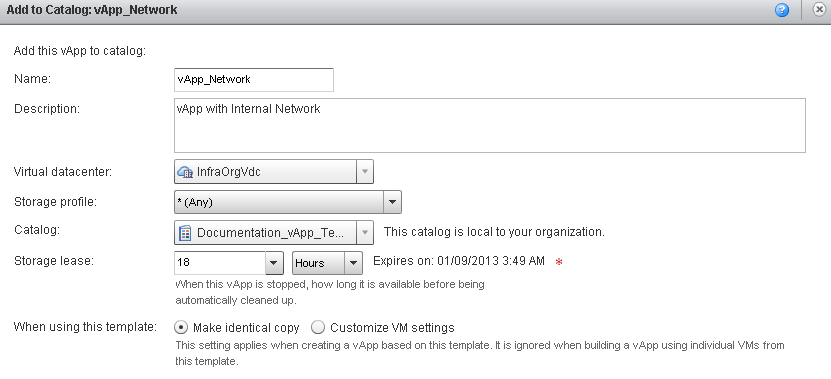
At this point we can capture this vApp to a catalog but there’s a major gotcha. In order for the internal network to be saved you must select “Make identical copy” on the capture screen. When someone adds this vApp Template to their cloud they won’t have to go through this process. They may have to change the connection between the internal network and organization network depending on their needs and if deployed across organizations.

Leave a comment